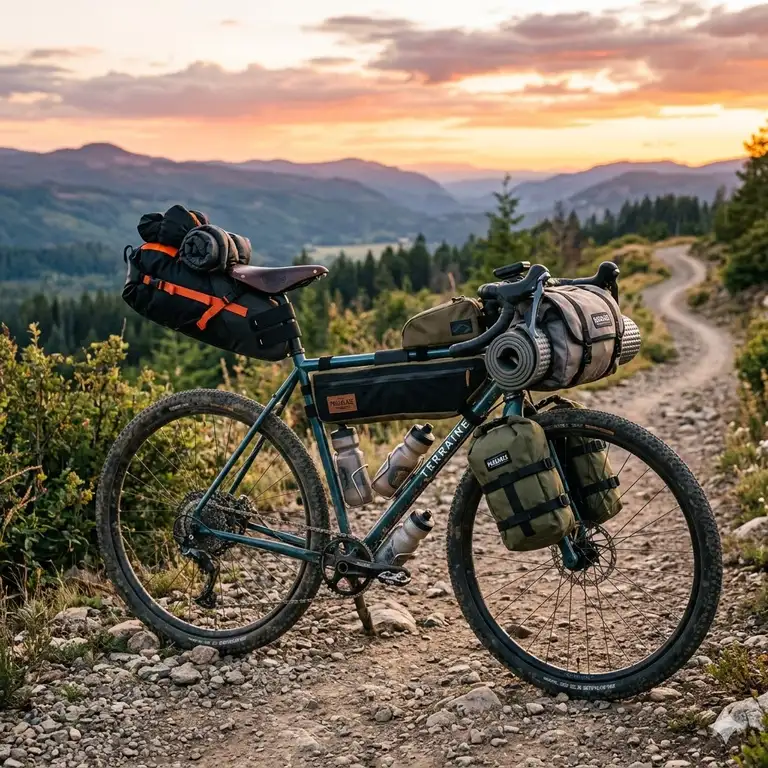
If there is one thing I have learned from over a decade of riding everything from the flint hills of Unbound to the muddy rutted roads of the Mid South, it is that the right gear is the difference between an epic adventure and a miserable slog. When we talk about gravel bike accessories, we are looking at a unique ecosystem of cycling gear designed to bridge the gap between road cycling aerodynamics and mountain biking durability.
What is gravel bike accessories? Simply put, they are specialized components, storage solutions, and navigational tools engineered to withstand high-frequency vibrations, unpredictable weather, and self-supported off-road endurance riding.
When I first started gravel riding, we just bolted heavy mountain bike parts onto cyclocross frames and hoped for the best. Fast forward to 2026, and the industry has matured. The sheer volume of products available can be overwhelming, and unfortunately, a lot of it is just repurposed road gear slapped with an “adventure” label and a 20% markup. My goal here is to cut through that marketing noise. In my field tests, I evaluate unsprung weight, telemetry data, and hydrostatic head ratings to see what actually survives a 5,000-mile season. Let’s dive into the upgrades that will actually transform your ride.
Quick Comparison Table: Top Picks for 2026
| Product | Category | Standout Feature | Best For | Est. Price Range |
| Garmin Edge 840 Solar | Navigation | Solar charging glass | Ultra-endurance racers | $400 – $460 |
| Ortlieb Seat-Pack (16.5L) | Storage | IP64 waterproof rating | Multi-day bikepackers | $160 – $180 |
| CushCore Gravel/CX | Tires/Wheels | Vibration damping | Rocky, technical terrain | $140 – $160 |
| CamelBak Chase Bike Vest | Hydration | Jersey pocket access | Fast unsupported rides | $90 – $110 |
| Silca Tattico Bluetooth | Maintenance | Digital app integration | Precision tire tuning | $110 – $130 |
The data above reveals a clear trend in modern adventure cycling: integration and self-sufficiency. Looking at the comparison, the Garmin clearly commands the highest investment, but for riders tackling 100+ mile routes, the solar battery extension justifies the premium over standard computers. Budget-conscious riders or those doing shorter 30-mile loops might find the Silca pump overkill, but if dialing in exact tire pressure to manage rolling resistance is your priority, it is an indispensable tool.
💬 Just one click — help others make better buying decisions too!😊
[addtoany]
Top 5 Gravel Gear Essentials: Expert Analysis
1. Garmin Edge 840 Solar
The Garmin Edge 840 Solar brings touchscreen functionality combined with tactile buttons, making it the ultimate command center for off-road navigation. Its standout specification is the Power Glass solar charging lens, which translates to real-world battery life extending up to 32 hours under ideal sun conditions. In practice, this means you can run power meters, heart rate monitors, and complex mapping screens on a full weekend bikepacking trip without carrying a heavy external power bank.
In my experience, what most reviewers miss about this unit is the ClimbPro 2.0 feature, which now works without a pre-loaded course. If you are exploring uncharted forest service roads, knowing exactly how much suffering is left on a blind 15% gradient is a massive psychological boost. This computer is purpose-built for ultra-endurance athletes and data nerds who refuse to compromise on battery anxiety.
Customers consistently praise the multi-band GNSS accuracy under heavy tree cover, though some note the screen is slightly dimmer than the non-solar version.
-
✅ Pros: Unmatched battery life, incredible GPS accuracy in forests, button/touch hybrid interface.
-
❌ Cons: Premium price point, screen slightly darker indoors.
-
Verdict: Sitting in the mid-$400s, it is a hefty investment, but for serious explorers, the navigational confidence is worth every penny.
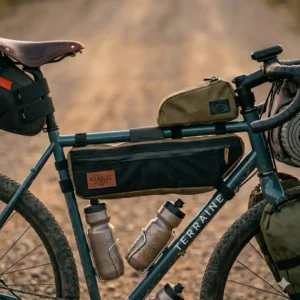
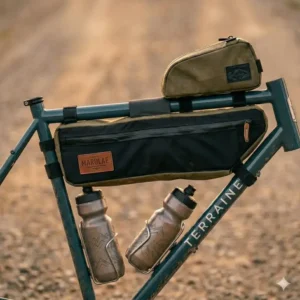
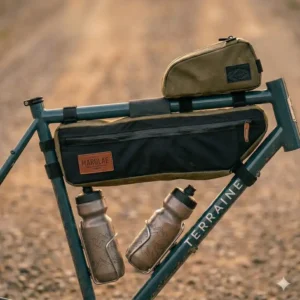
2. Ortlieb Seat-Pack (16.5L)
When it comes to hauling gear, the Ortlieb Seat-Pack (16.5L) is a masterclass in waterproof engineering. Featuring high-frequency welded seams and an IP64 waterproof rating, the practical translation here is that you can ride through a torrential downpour or cross a swollen river, and your down sleeping bag will remain bone dry. It utilizes heavy-duty Velcro saddle stem straps and a roll-top closure that compresses anywhere from 8 to 16.5 liters of gear.
What surprised me most during use was the internal stabilization design. Most large saddle bags suffer from “tail wag” when you stand up to pedal, throwing off your center of gravity. Ortlieb combats this with stiffened internal paneling. If you are a bikepacker planning multi-day trips across rugged terrain, this is the gold standard. I’ve dragged this bag through thorny singletrack and it has yet to tear.
Feedback highlights its indestructible nature, though shorter riders often struggle with the minimum tire clearance required.
-
✅ Pros: 100% waterproof reliability, minimal tail wag, doubles as a rear fender.
-
❌ Cons: Requires significant exposed seat post, air valve can be finicky.
-
Verdict: In the $160-$180 range, it outlasts cheaper bags by years, making the total cost of ownership incredibly low.
3. CushCore Gravel/CX Tire Inserts
Tire inserts have revolutionized off-road drop-bar riding, and the CushCore Gravel/CX Tire Inserts lead the pack. Made from a proprietary closed-cell foam, these inserts take up roughly half the internal volume of your tire. This does two critical things in the real world: it allows you to drop your tire pressure down to 22-25 PSI without risking pinch flats, and it acts as a mechanical shock absorber.
The spec sheet won’t tell you this, but the reduction in high-frequency chatter is life-changing. Over a 10-hour race, the micro-vibrations from gravel roads absolutely destroy your triceps and lower back. CushCore dampens that energy before it reaches your frame. This is a mandatory upgrade for aggressive riders who push their limits on rocky, root-heavy technical descents.
While users rave about the cornering support and flat protection, they universally lament the incredibly difficult installation process.
-
✅ Pros: Phenomenal vibration damping, zero pinch flats, run-flat capability.
-
❌ Cons: Extremely difficult to install, adds about 120g of rotational weight per wheel.
-
Verdict: Priced around $150 a pair, they act like micro-suspension for your rigid bike, offering unmatched ride quality.
4. CamelBak Chase Bike Vest
Hydration management is tricky on smaller frames, making the CamelBak Chase Bike Vest a brilliant solution. It features a 1.5-liter Crux reservoir and sits high on your back. The real-world meaning of this high-riding design is that you maintain full access to your standard cycling jersey pockets underneath it.
In my field tests, I found this vest to be a game-changer for hot, fast, unsupported rides where two frame bottles just aren’t enough. It distributes water weight across your chest and shoulders rather than weighing down your bike frame, which keeps your bike feeling nimble and lively on steep climbs. The front harness pockets easily hold gels, a phone, and salt pills. It’s ideal for racers and fast-paced weekend warriors.
Rider reviews love the breathability of the 3D vent mesh, though broad-shouldered cyclists sometimes find the front straps a bit snug.
-
✅ Pros: Preserves access to jersey pockets, incredible storage organization, keeps water weight off the frame.
-
❌ Cons: Can feel warm in 90°F+ weather, reservoir can be tricky to clean.
-
Verdict: Floating around the $100 mark, it is an essential piece of endurance gear for long summer grinds.
5. Silca Tattico Bluetooth Mini Pump
The Silca Tattico Bluetooth Mini Pump marries old-school mechanical reliability with modern tech. It is a premium aluminum mini-pump that houses a hidden Bluetooth pressure sensor, connecting directly to an app on your phone. This means you get a highly accurate digital gauge (accurate to within 1%) without the fragility of an integrated analog dial on the pump body itself.
Most reviewers claim digital mini-pumps are a gimmick, but in practice, I found this to be incredibly valuable for mid-ride adjustments. If it starts raining and you need to drop your tires from 35 PSI to 28 PSI for traction, the Tattico lets you hit that exact number rather than just guessing by squeezing the sidewall. Built for the meticulous gearhead or racer where tire pressure dictates performance, this pump is flawless.
Buyers praise the buttery smooth pumping action and heat-dissipating barrel, though some complain about needing to open a smartphone app with dirty hands.
-
✅ Pros: Unrivaled pressure accuracy, rebuildable components, excellent heat management.
-
❌ Cons: App dependency for reading pressure, very expensive for a mini-pump.
-
Verdict: At roughly $120, it is a luxury item, but for those who understand rolling resistance, it is a precise and necessary instrument.
✨ Don’t Miss These Exclusive Deals!
🔍 Take your cycling setup to the next level with these carefully selected products. Click on any highlighted item to check current pricing and availability. These tools will help you create authentic adventures you’ll never forget!

Practical Usage Guide: Setting Up Your Cockpit for 100-Mile Days
Buying the right gravel bike accessories is only half the battle; how you mount them dictates your comfort. When setting up your cockpit for ultra-endurance rides, the goal is ergonomic efficiency and vibration mitigation.
The Gel Tape Hack:
Before wrapping your handlebars with a thick 3mm or 4mm gravel-specific bar tape, place medical-grade silicone gel pads on the tops and drops. The spec sheets say this adds 40 grams, but what it actually does is widen the surface area of the bar where your palms rest, distributing pressure away from your ulnar nerve. Hand numbness is a ride-ender, and this $15 trick works better than carbon handlebars.
Out-Front Mount Optimization:
When mounting your GPS (like the Garmin discussed earlier), always use an out-front mount rather than a stem mount. Why? Stem mounts force you to drop your chin to your chest to view your route, taking your eyes entirely off the road. An out-front mount keeps the screen in your peripheral vision, allowing you to scan for potholes and loose gravel while monitoring your power output. Also, utilize the underside of these mounts to hide a GoPro or a high-lumen headlight, freeing up precious handlebar real estate for feed bags.
Real-World Scenario: The Commuter vs. The Ultra-Racer
Not all riders need the same gear. Let’s look at two distinct profiles and how their approach to equipping their bikes should differ drastically.
Profile 1: The Daily Commuter / Weekend Explorer
Sarah rides 15 miles a day to work on mixed-use paths and hits fire roads on Saturdays. Her priority is versatility and low maintenance. For her, running heavy tire inserts is unnecessary rotational weight. Instead, she benefits massively from a robust bolt-on top tube bag (for keys, snacks, and phone) and reliable, USB-rechargeable lighting. She doesn’t need an aerodynamic hydration vest; a simple half-frame bag allows her to carry a U-lock, a light jacket, and a standard water bottle.
Profile 2: The Unbound 200 Racer
Mark is lining up for a 200-mile race in Kansas. His needs revolve around aerodynamics, self-sufficiency, and metabolic fueling. For Mark, the CamelBak Chase vest is mandatory, as grabbing bottles through washboard descents is dangerous. He requires the CushCore inserts because a pinch-flat at mile 150 ruins his race. Mark’s storage needs to be aerodynamic—tucking a tool roll tightly beneath the saddle and utilizing a bento box behind the stem to cheat the wind, saving him precious watts over a 13-hour day.
Problem-Solving Guide: Defeating the Elements
Off-road riding introduces mechanical and physiological challenges you rarely see on pristine tarmac. Here is how to use specific gravel bike accessories to solve the most common pain points.
Problem 1: Chain Slap and Dropped Chains
As you bomb down a washboard descent, your chain bounces violently, chipping your frame’s paint and potentially jumping off the chainring.
Solution: Beyond relying on your derailleur’s clutch, apply a mastic tape or a neoprene chainstay protector. It drastically silences the bike. Pair this with a minimalist, braze-on chain guide for 1x drivetrains. You’ll never drop a chain again.
Problem 2: Hydration Contamination
When riding through cow pastures or muddy trails, standard water bottle nozzles get coated in literal dirt and feces. Taking a drink becomes a gastrointestinal hazard.
Solution: Swap out standard bottles for ones with integrated mud caps (like the CamelBak Podium Dirt Series). It adds one extra step to drinking, but it prevents you from ingesting trail grit.
Problem 3: The Frame Bag Paint Rub
Strap-on frame and saddle bags act like sandpaper against your carbon or aluminum frame when grit gets trapped underneath the velcro straps.
Solution: Before installing any bags like the Ortlieb Seat-Pack, wipe the frame down with isopropyl alcohol and apply a clear 3M helicopter tape to all contact points. This $20 protective film preserves the resale value of your $3,000 bike.
How to Choose Gravel Bike Accessories (Expert Framework)
Purchasing gear should never be random. Use this decision framework before pulling out your credit card:
-
Analyze Your Local Terrain: If you ride smooth hardpack dirt, you don’t need heavy tread tires or inserts. Prioritize aerodynamics. If you ride chunky, fist-sized river rocks, durability and vibration damping (wider tires, inserts, compliant seat posts) take precedence over weight.
-
Evaluate the “Unsprung Weight” Penalty: Weight attached to your wheels (tires, rims, inserts) matters significantly more than weight attached to your frame. Heavier wheels feel sluggish when accelerating. Balance puncture protection with rotational mass.
-
Check IP Ratings for Storage: Don’t buy bags labeled “water resistant.” Look for an official IP rating (like IP64 or IP67). True bikepacking requires welded seams, not stitched fabric, to survive relentless rain.
-
Prioritize Ergonomic Contact Points: The three places your body touches the bike—hands, feet, and rear end—are where you should spend your money first. Carbon handlebars, premium bib shorts, and vibration-absorbing bar tape offer the highest return on investment.
-
Calculate Power Requirements: For navigation and lighting, map out your longest expected ride. If your lights and GPS can’t outlast your legs, you are severely limiting your exploring potential.
Evaluating Value: Budget vs Premium
| Gear Type | Entry-Level ($) | Premium ($$$) | Is it worth the upgrade? |
| Bar Tape | EVA Foam | Polyurethane + Gel | Yes. Premium tape dampens trail buzz far better. |
| Bags | Stitched Nylon | Welded/Waterproof | Yes. Wet sleeping gear ruins trips. |
| Pumps | Basic Plastic | CNC Alloy w/ Bluetooth | No. Only for racers needing exact PSI data. |
Looking at this value breakdown, it becomes clear that not every premium item is necessary. While upgrading to welded waterproof bags is a non-negotiable safety requirement for multi-day trips, spending over $100 on a Bluetooth pump is an absolute luxury. Spend your money where it impacts comfort and survival first, and leave the hyper-technical gadgets for later down the road.
For excellent resources on how tire pressure and rolling resistance impact your ride, I highly recommend diving into the independent testing data at Bicycle Rolling Resistance, which validates a lot of the performance claims we see today.
Common Mistakes When Buying Gravel Gear
It’s easy to get caught up in the aesthetics of adventure cycling and make purchasing errors. Here are the pitfalls I see most often in my consulting work.
Ignoring Clearances and Real Estate
The most common mistake is buying massive handlebar rolls or saddlebags without measuring tire and knee clearance. If you ride a small 52cm frame, a 16.5L seat pack will likely rub against your rear tire when you hit a bump. Similarly, buying wide handlebar bags can crimp your shift cables and leave zero room for your hands on the tops of the bars.
Over-packing “Just in Case” Items
Because gravel riding takes you away from cell service, beginners tend to pack like they are crossing the Sahara. Carrying three heavy inner tubes, a massive multi-tool with chainbreakers you don’t know how to use, and pounds of excess food slows you down and ruins the handling of the bike. Learn to pack efficiently. Switch to tubeless tires to carry fewer tubes, and use a minimalist tool system.
Buying Cheap Mounts
You just spent $400 on a cycling computer and $100 on a headlight, and then you mount them to your handlebars with cheap plastic brackets. The high-frequency vibrations of gravel will snap cheap plastic within a month, sending your expensive electronics into the dirt. Invest in CNC-machined aluminum mounts.
Gravel Gear vs. Road Bike Gear: The Fundamental Differences
Why can’t you just use your road cycling gear? You can, but you will quickly find its limitations. Road gear prioritizes light weight and aerodynamics over durability and comfort.
For example, road cycling shoes typically feature completely stiff carbon soles with minimal rubber tread. If you hit a muddy hike-a-bike section on a gravel route, road shoes become literal ice skates, making it impossible to walk. Gravel-specific shoes offer slightly more flex in the toe box for walking and feature aggressive rubber lugs (often compatible with toe spikes) to grip the dirt.
Similarly, road bike apparel focuses on skin-tight aerodynamics. While gravel racers still wear tight kits, standard gravel apparel often includes abrasion-resistant paneling on the hips and shoulders to protect you during inevitable slide-outs in the loose dirt. Furthermore, the cargo bib short—featuring mesh pockets on the thighs—is a gravel innovation that roadies are just now adopting. It allows for easy access to nutrition while keeping your upper body relaxed. For a deep dive into the history and ethos of self-supported off-road riding, Wikipedia’s entry on Bikepacking is an excellent primer.
What to Expect: Real-World Durability Over 5,000 Miles
When you invest in premium gravel bike accessories, understanding the longevity and maintenance cycle is crucial. Here is the “Year One” roadmap for what happens to your gear when subjected to the elements.
Months 1-3: The Honeymoon Phase
Everything works perfectly. Zippers glide, velcro is sticky, and tires hold air for weeks. During this period, your only job is to dial in your ergonomic setup.
Months 4-6: The Grit Intrusion
By month six, fine silica dust and mud will have worked their way into everything. This is where cheap gear fails. Zippers on budget frame bags will blow out. If you own high-quality bags, this is when you must perform maintenance: clean the zippers with a toothbrush and apply a zipper lubricant or beeswax. Additionally, your tubeless tire sealant will have dried up; you must top it off to maintain puncture protection.
Months 7-12: The Bearing and Fabric Test
By the end of year one, the constant vibration will have tested every bolt on your bike. Check the torque specs on all your accessory mounts. UV exposure will start to slightly fade the fabric of your bags. If you use a hydration vest, the reservoir tube may start developing biofilm if you haven’t been using cleaning tablets. High-quality items like the Garmin or Ortlieb bags will look a bit battered but will function at 100%. Expect to replace bar tape yearly, as sweat and dirt degrade the foam structure.
Features That Actually Matter (And Those That Don’t)
Marketing departments love to invent acronyms and highlight flashy features. Here is how I filter the hype:
Features That MATTER:
-
Tubeless Compatibility: If a wheelset or tire is not tubeless-ready in 2026, do not buy it. Tubeless is non-negotiable for off-road riding.
-
Reflective Accents: Gravel routes often require linking paved roads at dawn or dusk. Passive visibility on your bags and shoes saves lives. (Learn more about safe cycling practices via resources like Cycling UK).
-
Modular Storage: Bags that can be easily removed from their harnesses (like drybag holsters) are vastly superior to bags you have to unstrap entirely in the cold rain when you get to camp.
Features That DON’T Matter:
-
Aerodynamic Zippers on Frame Bags: Unless you are averaging 22 mph at the front of a race, the aerodynamic drag of a zipper pull is entirely irrelevant compared to your body position.
-
Ultra-lightweight Hardware: Titanium bolts on accessory mounts save fractions of a gram but are prone to seizing or snapping under torque. Stick to high-quality stainless steel or alloy for mounts.
-
Excessive Screen Sizes on GPS: Massive 4-inch screens drain battery rapidly and take up too much handlebar space. A 2.6 to 3-inch screen is the sweet spot for mapping without draining power.
✨ Take Action on Your Next Adventure!
🔍 Ready to transform your ride? Click on any of the highlighted products above to check current pricing, read more user reviews, and secure the gear that will make your next 100 miles your best yet!
Conclusion
Equipping yourself with the right gravel bike accessories is an ongoing journey of refinement. It is about analyzing your specific terrain, understanding your physical limitations, and selecting tools that mitigate fatigue and mechanical failure. Whether you are shelling out for the solar navigation of the Garmin Edge 840, or simply implementing the silicone bar tape hack for hand comfort, every adjustment should serve a practical purpose.
Remember, the goal isn’t to buy everything on the market; the goal is to buy gear that fades into the background so you can focus entirely on the crunch of the gravel beneath your tires and the horizon ahead. Stop tolerating numb hands, dropped chains, and battery anxiety. Upgrade smartly, pack efficiently, and let the equipment work for you.
Frequently Asked Questions
❓ What are the most essential gravel bike accessories for beginners?
✅ Tubeless tire repair kits (plugs and sealant), a reliable mini-pump, and a comfortable saddle are non-negotiable. Once flats and comfort are managed, invest in a half-frame bag for snacks and tools, and decent water bottle cages that won’t launch your bottles on bumpy descents…
❓ Can I use road bike pedals for gravel riding?
✅ It is highly discouraged. Road cleats easily clog with mud and are slippery to walk in. Standard SPD (mountain bike) pedals and shoes offer dual-sided entry, shed mud effortlessly, and allow you to hike-a-bike over unrideable terrain safely…
❓ How much tire clearance do I need for gravel accessories like fenders?
✅ Fenders require a minimum of 4-6mm of clearance between the tire and the fender itself to prevent mud buildup. If your frame maxes out at 40mm tires, you should only run 35mm tires if you plan to install full-coverage fenders…
❓ Are handlebar bags better than saddlebags for bikepacking?
✅ They serve different purposes. Handlebar bags are excellent for lightweight, bulky items like sleeping bags and tents. Saddlebags are better for denser, heavier items, as placing too much weight on the handlebars negatively impacts the steering dynamics of the bike…
❓ How often should I replace my tubeless tire sealant?
✅ Every 3 to 6 months, depending on your climate. In hot, dry areas, the liquid latex dries out much faster. Shake your tire; if you don’t hear a sloshing sound, it is time to inject another 2 ounces of sealant through the valve stem…
Recommended for You
- 5 Best Foldable Bike Bag Models for Worry-Free Transit (2026)
- 5 Best ebike bag Solutions for 2026: Expert Field Tests & Reviews
- 5 Best Electric Bike Bags for 2026: Stop Overloading Your Back!
Disclaimer: This article contains affiliate links. As an Amazon Associate, I earn from qualifying purchases. If you purchase products through these links, we may earn a small commission at no additional cost to you.
✨ Found this helpful? Share it with your friends! 💬🤗
[addtoany]